Running a promotion or sale as a website owner isn’t always the most convenient part of running the site. Sales often don’t begin or end during typical operating hours, many times beginning and ending with the start of a calendar day instead. Using Divi’s condition options, you can now have set-it-and-forget-it sales banners pop up (and disappear) precisely when you need them to. You can be forgetful, in a different time zone, or even conked out asleep, and your website will still reveal a sales banner at precisely the time you choose. Your promo will be ready even if you’re not. Let’s dig in and see how to accomplish this wizardry.
How to Reveal a Sales Banner at Midnight Precisely
For this tutorial, we’re going to be using the Divi Theme Builder. You can follow these same steps in the traditional Divi Builder if you want to reveal the sales banner on a specific page or post, but we are going to be using the theme builder to display the promotion globally. You can find the Divi Theme Builder in your WordPress dashboard under Divi – Theme Builder.

Edit the Global Header
We will be placing the sales banner to reveal in the Global Header of the Default Website Template so that it gets the most coverage on the site. Begin by clicking the Edit button to open the Divi Builder.

Create a New Section and Row
There are a couple of ways you can add the sales banner to your site. You might have an image that serves as the banner that you will display using Divi modules. Or you can use Divi to design the banner entirely out of existing modules. We are going to do the latter, opting to use the Divi Builder to create a section of your website header that functions as a banner.
Again, as we said above, conditional logic works the same on all sections, rows, and modules, so you can easily adapt this tutorial to your particular situation.
In the Divi Builder, click the blue + icon and insert a new regular section.

Then, select the layout for your banner section’s row by clicking the green + icon. We will select a single-column row to keep the design as simple as possible, though any will work. We will be applying the conditional logic to the section, so everything within is included.

Choose Your Content Module
When you insert your row, Divi prompts you to choose a module. (Or you can do it yourself by clicking the black + icon). If you have an image for your banner, you will want to choose the Image module to display it. If not, then choose the Text module from the dropdown. We will be using typical website elements to reveal the banner.

Set Section Width
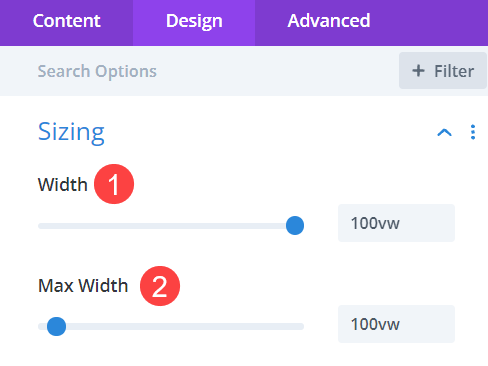
Next, go into the Section settings so that you can adjust the overall width. Navigate to the Design tab and find the Sizing subsection. Adjust both the Width and Max Width to 100vw. This value will ensure it always sits at 100% of the viewport width regardless of the user’s screen size.
Add a Background Gradient to the Section
Next, go to the Content tab and find the Background subsection. Then, go into the second tab to enter the gradient selection, and then click Add Background Gradient.

You then choose the two colors you want to merge. We are going with #fe5a25 for the first color and #c206c9 for the second. Then, we will select Radial as the Gradient Type, and Center as the Radial Direction. Together, this means the gradient will radiate outward in a circle from the middle of the section.

Make Section Clickable
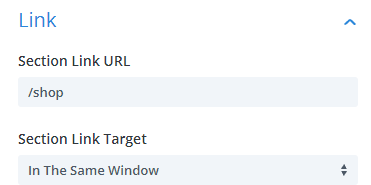
Because this is a sales banner, you will want the entire thing to be clickable and take your users to the sale. Continue in the Content tab to find the Link subsection and then enter the URL for where you want your users to go.
Adjust Text Module Content
Now, it’s time to enter the content for whatever your promotional sale banner is going to announce. Enter the Text Module Settings. Under the Content tab, we are going to keep it simple with a H2 heading that reads The Midnight Sale Begins Now and body text that reads All products are 50% off until dawn.

Add Header and Text Styling
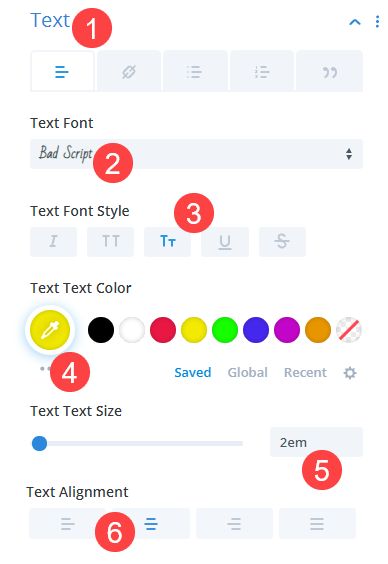
Next, you will want to change the fonts and colors for the headings and body text of the banner. Under Text, we will choose Bad Script as the Text Font Small Caps as the Text Font Style. We are using #f2ea00 as a complimentary Text Color to the background selections and 2em as the Text Size. We also want the Text Alignment to be Center.
Next, we are selecting the Heading Text subsection and clicking the H2 tab. Under it, we will choose Bold for the Heading 2 Font Weight and again adding #f2ea00 as the Heading 2 Text Color. We are also changing the Heading 2 Text Size to 3rem so that it is sizing in units relative to the other text on the screen.
Fix Section to the Screen
Because it’s a timed sale, you don’t want your users missing out on it. So we’re going to fix the section to their screens so that no matter where they scroll, the banner is there for them to click. Go into the Advanced tab of the Section settings and choose the Position subsection. Then select Fixed from the dropdown and click the bottom-middle square in the Location grid. Finally, set a high value for the Z Index (we choose 999 to ensure floating above other elements).

Now, the section will stick to the bottom of the user’s screen as they scroll and navigate the site. Save your changes, and you have a sales banner ready to reveal your visitors at midnight! So let’s do that now.

Add Conditional Logic
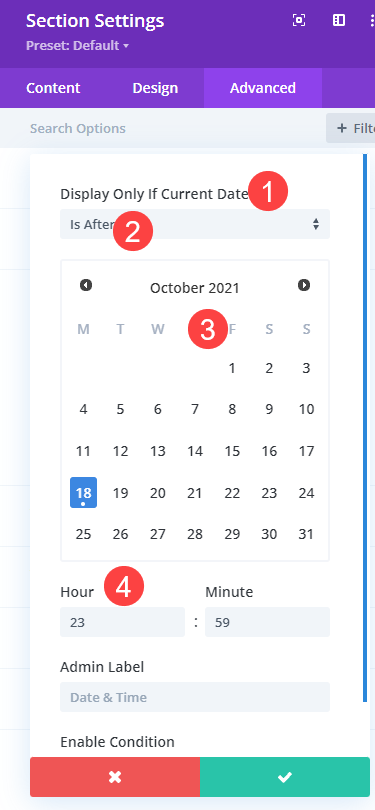
You will use Divi’s condition options to reveal the banner at midnight. You will find those also in the Advanced tab of the Section settings. Find the Conditions section and click the grey + icon that reads Add Condition.
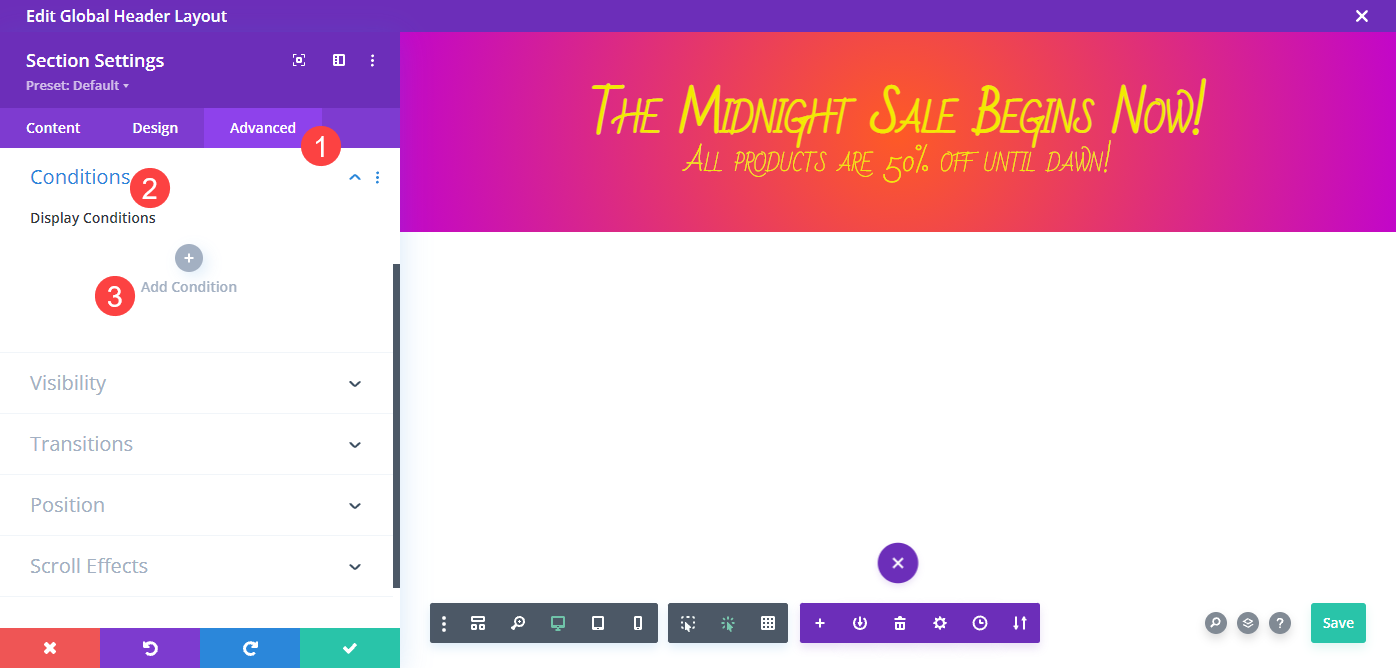
Select Display Only if Current Date… from the dropdown and then in the new window select Is After. Here’s the important part: on the calendar, choose the day before you want the banner to appear. If you want it to start on October 19 at midnight, select October 18, for example. Then set the hour and minute to 23:59. In 24-hour notation, 00:00 is the equivalent of midnight, so these settings will reveal this new sales banner at precisely midnight (or 1 minute after 23:59 on the date you choose).
Note: if the sale you’re revealing this banner ends at a specific time, you can add a second condition to the section, following these same instructions but select Is Before and setting the end date. Doing so will provide a timed window that the banner will appear on your site.
Wrapping Up
Divi’s condition options let you set any number of criteria for displaying content on your website. By designing a simple, clickable section as a sales banner and setting a condition option to show after a certain date and time, you can schedule your promotion’s reveal at midnight and then not have to be awake in the middle of the night to launch it.
What kinds of timed events will you reveal using Divi’s condition options?
Article featured image by wongstock / shutterstock.com
The post How to Reveal a Sales Banner at Midnight Precisely with Divi’s Condition Options appeared first on Elegant Themes Blog.