Divi footer WordPress menus are an important part of any footer. Menus can be created with text links, menu modules, or widgets. The Divi menu module places the links on a horizontal line. However, footers often utilize menus with links that stack vertically. Fortunately, these menus are easy to add to Divi footers. In this article, we’ll see how to add WordPress menus to your Divi footer.
Divi Footer WordPress Menus Preview
Here are the Divi footer WordPress menus that we will create. They will allow us to change them easily. Rather than adding the Divi footer WordPress menus with the Divi menu module, we’ll add them with widgets. This allows the menu items to stack vertically, and it’s easy to change them later.
Desktop

This is the desktop view. We’ll create the Shop Categories and About Us menus.
Mobile

Here’s how they will look on mobile.
Create Your Divi Footer WordPress Menus
We’ll start by creating the Divi footer WordPress menus. I’m creating two menus: one for a shop with the shop pages and one for information about the company.
Create the About Us Footer Menu
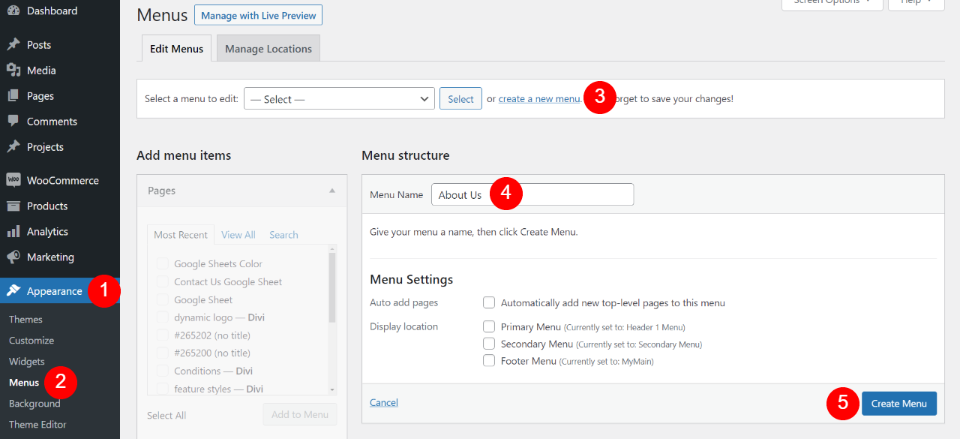
First, create the menus you want to include in your footer. In the WordPress dashboard, go to Appearance > Menus. Click Create a new Menu. Name your menu and click Create Menu. You won’t need to set them as footer menus because we’re going to select them within Divi.

Create the menu and save it. Next, add the pages you want. Then, arrange them in the order you want to display them. When you’re ready, click Save Menu.
Create the Shop Categories Footer Menu

For the shop menu, I’m using WooCommerce. Create a new menu by selecting Create a New Menu at the top of the menu editor. Provide a name in the menu name field and click Create Menu.
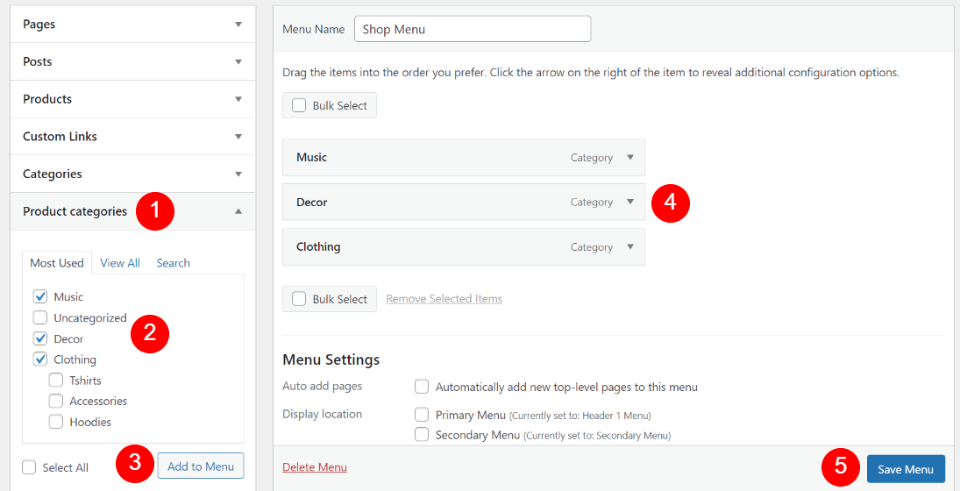
WooCommerce adds new options to the menu structure. Select Product Categories in the left sidebar. Choose the categories you want to include in the menu. Click Add the Menu. Arrange them in the order you want. Click Save Menu. We will add these menus to widgets.
Add the Footer Widgets
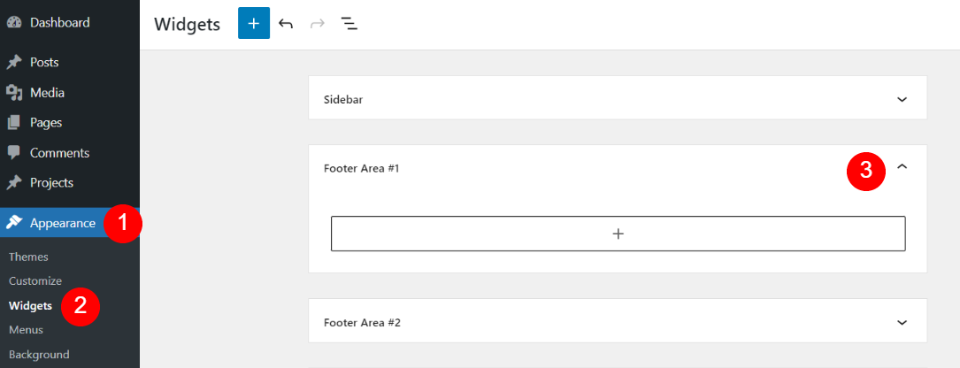
Next, add the menus to the footer widgets. First, go to Appearance > Widgets in the WordPress dashboard. Next, select a Footer Area that you’re not using. Divi has six Footer Areas to choose from and you can add a new widget area using the tool at the bottom of the page if you need to. I’ve selected Footer Area #1.

Within the Footer Area that you want to use, click the plus symbol to open the list of blocks. Search for “menu” and select Navigation Menu from your choices.
Add the About Us Menu

Give the menu a name and choose the menu you want to display. Click Update in the upper right corner. Now it’s time to repeat this process for the next menu.
Add the Shop Menu

For this one, I’ve selected Footer Area #2. Insert the Navigation Menu block, add a title, choose Shop Menu, and select Update.
Your menus are now ready to be added to your Theme Builder templates.
Add a Footer Template in the Theme Builder

First, you’ll need a footer template. You can create your own or upload one. I’m using the footer template from the free Header and Footer Template for Divi’s Essential Oils Layout Pack. Find more in the Divi blog by searching for “free footer”. Download the template and unzip it.
Next, add a template to the Divi Theme Builder. In the WordPress dashboard, go to Divi > Theme Builder. Select Portability and click Import in the modal that opens. Click Choose File, navigate to the file, select it, and click Import Divi Theme Builder Templates.
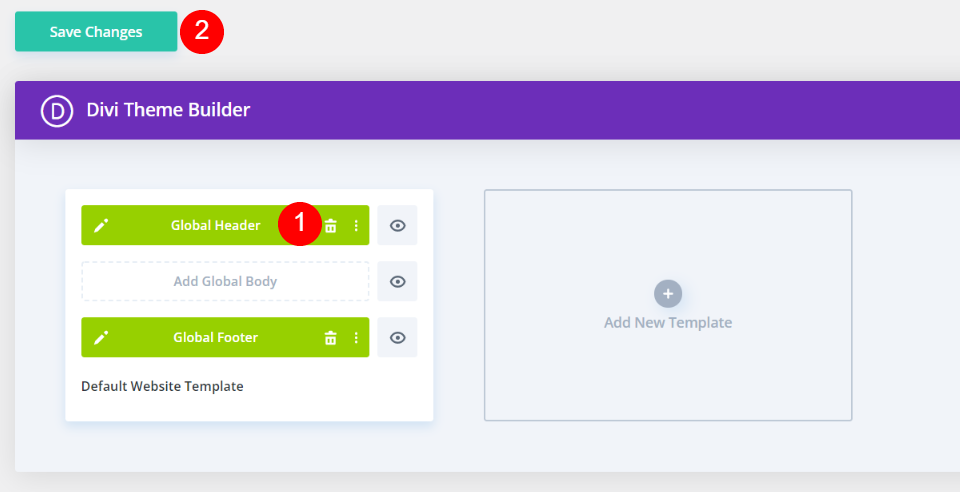
This will include a header file. Delete it if you don’t want to use it. Save your changes and navigate to the front-end of your website. We’ll do the rest of the work using Divi’s new full site front-end editing feature.
Edit the Divi Footer WordPress Menus on the Front-end

On the front-end of your website, select Enable Visual Builder at the top of your screen. Since the footer is global, it doesn’t matter what page you’re on.
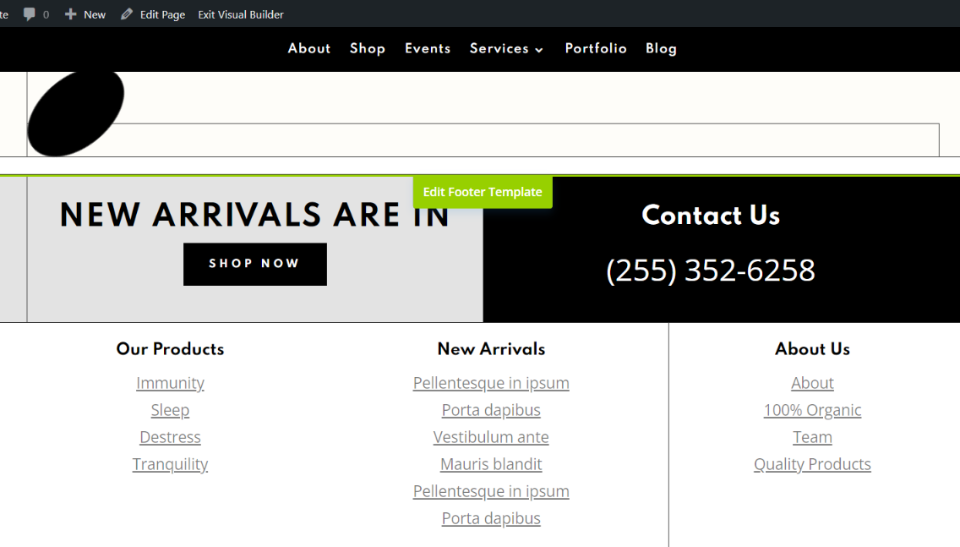
Hover over the footer and select Edit Footer Template. We will add the two menus by replacing the Our Products and About Us areas. In this layout, both areas were created with multiple text modules. We’ll replace them with sidebar modules to display the menus we created.
Add the About Us Sidebar

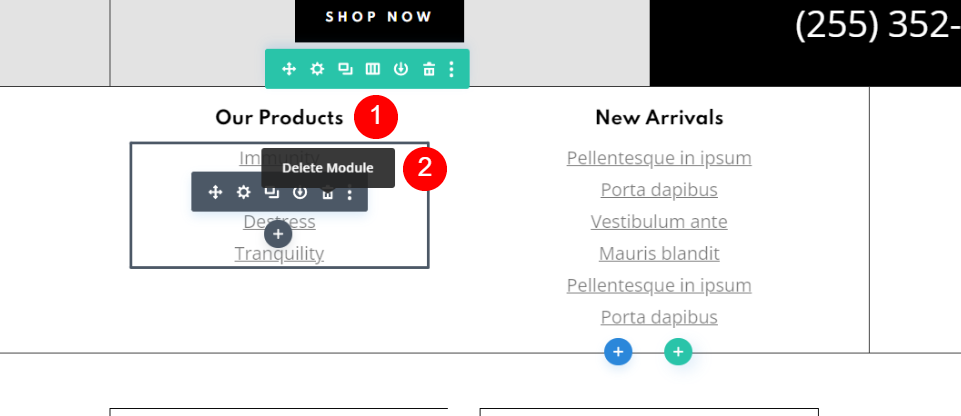
First, delete the two text modules that create the About Us menu.

Next, we need to add a sidebar module where you want to display the menu. Hover over the area you want to add the module and click the black plus symbol. Search for “sidebar” and click the Sidebar module.
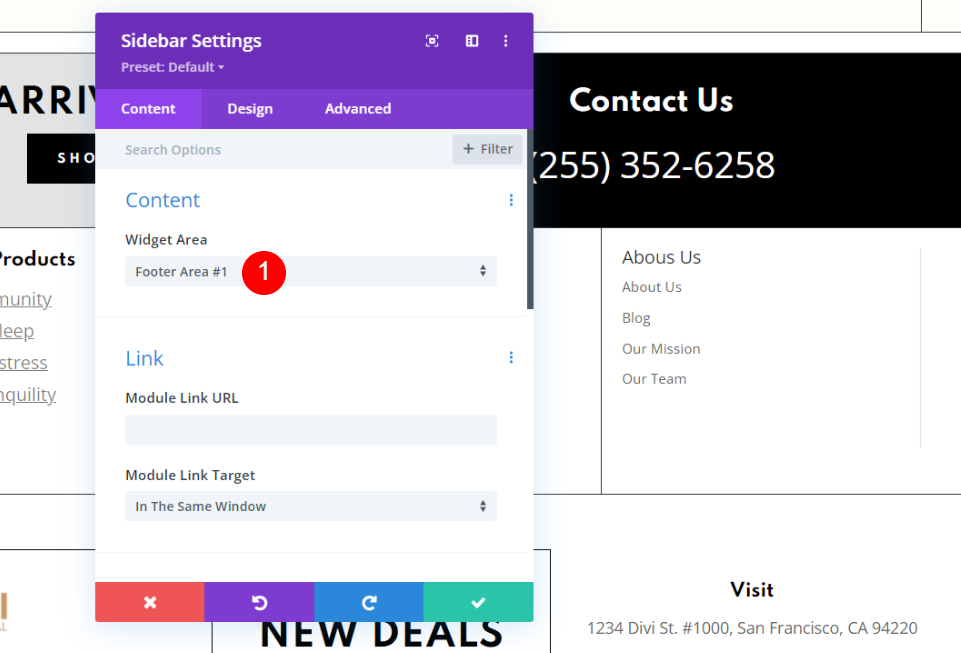
The module’s setting will open. Select Footer Area #1. This will display the menu under the text module that we want to replace.
Style the About Us Sidebar
Layout and Text Settings
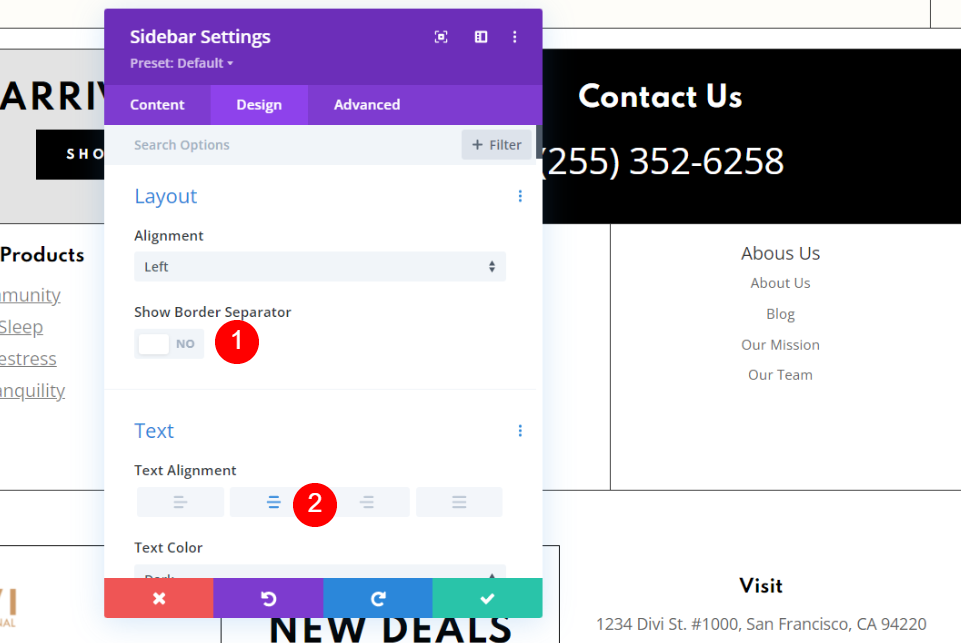
Select the Design tab for the sidebar module settings. Disable Show Border Separator. Under Text, select Center Alignment.
- Show Border Separator: Disable
- Text Alignment: Center

Phone Text Settings
Hover over Text Alignment and select the device icon when it appears. Click on the Phone icon and select Center Alignment.
- Text Alignment
- Phone: Center
- Title Font: Spartan
- Title Font Weight: Bold
- 18px
- Line Height: 1.4em
- Title Text Size
- Phone: 13px
- Title Line Height: 1.4em
- Body Font: Default
- Font Weight: Light
- Font Style: Underline
- Desktop
- Body Text Size: 18px
- Body Line Height: 1.4em
- Phone
- Body Text Size: 14px
- Body Line Height: 1.2em
- Widget Are settings: Footer Area #2

Title Text
Scroll down to Title Text. Choose Spartan for the Title Font and select Bold for the Title Font Weight.
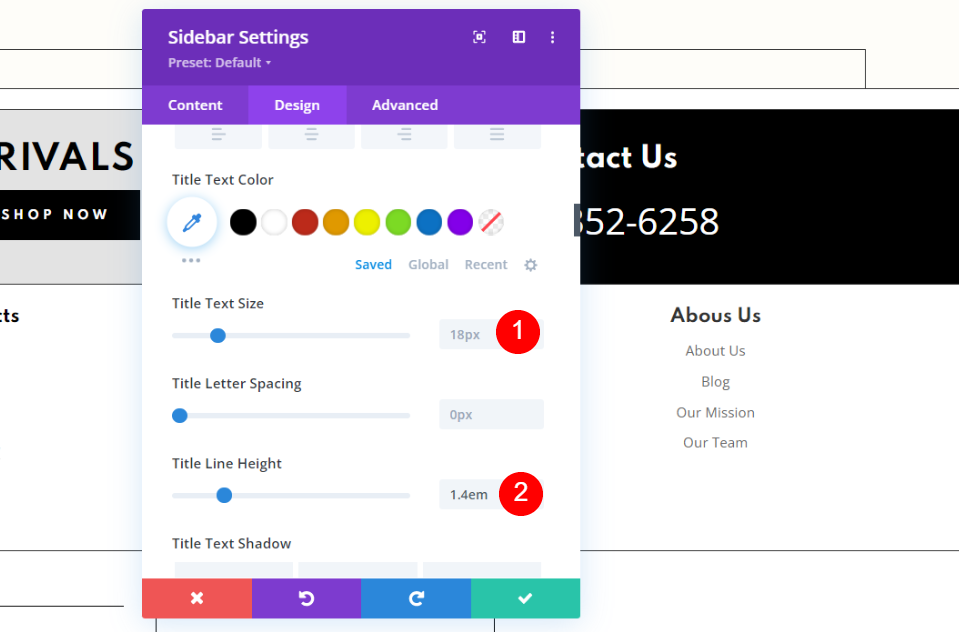
Leave the Title Text to 18px. Set Title Line Height to 1.4em.

Hover over Title Text Size and select the device icon. Choose the Phone icon and set the Title Text Size to 13. Leave Title Line Height at 1.4em.

Body Text
Under Body Text, leave the Font at Default. Set the Font Weight to Light. Set the Font Style to Underline.

Set the Body Text Size for the Desktop to 18px. Set the Body Line Height to 1.4em.

Select the Device icon for the Body Text Size. Set the Phone Body Text Size to 14px. Select the Device icon for the Body Line Height and set the Phone Body Line Height to 1.2em.
Add the Shop Categories Sidebar
Next, we’ll replace the Our Products menu with a sidebar that will show our shop categories. First, delete the two text modules.
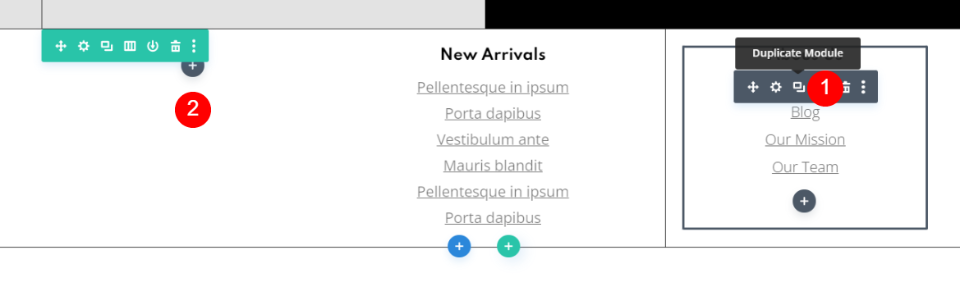
Next, duplicate the About Us sidebar module and drag it into the location of our Shop Categories menu.
Select the Shop Categories Menu

Open the Sidebar module. In the Widget Area settings, select Footer Area #2.
Now save the changes and exit the Visual Builder. We’re done.
Divi Footer WordPress Menus Results
We now have two new menus that are easy to change. Here’s how they look on desktop and mobile.
Desktop
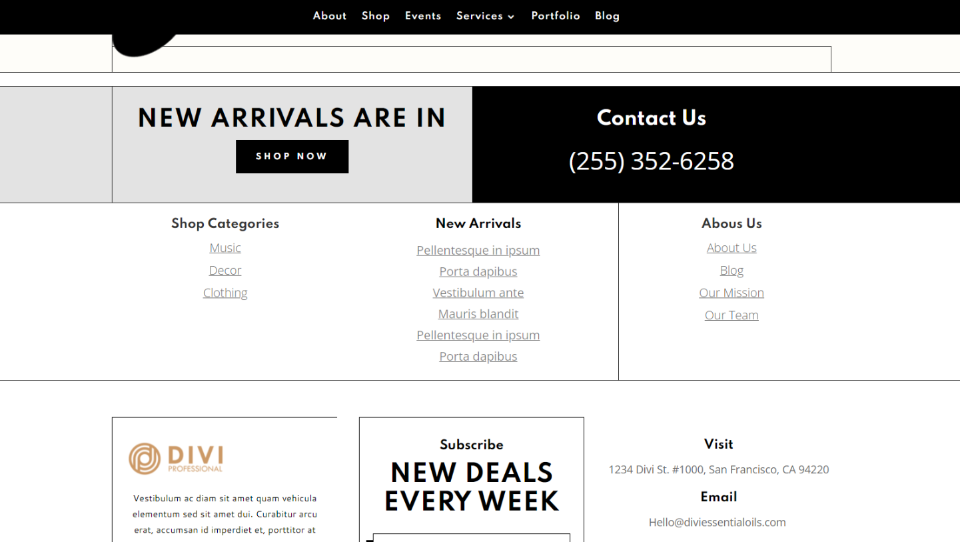
Here are the two menus on the desktop. They work well within their space.
Mobile
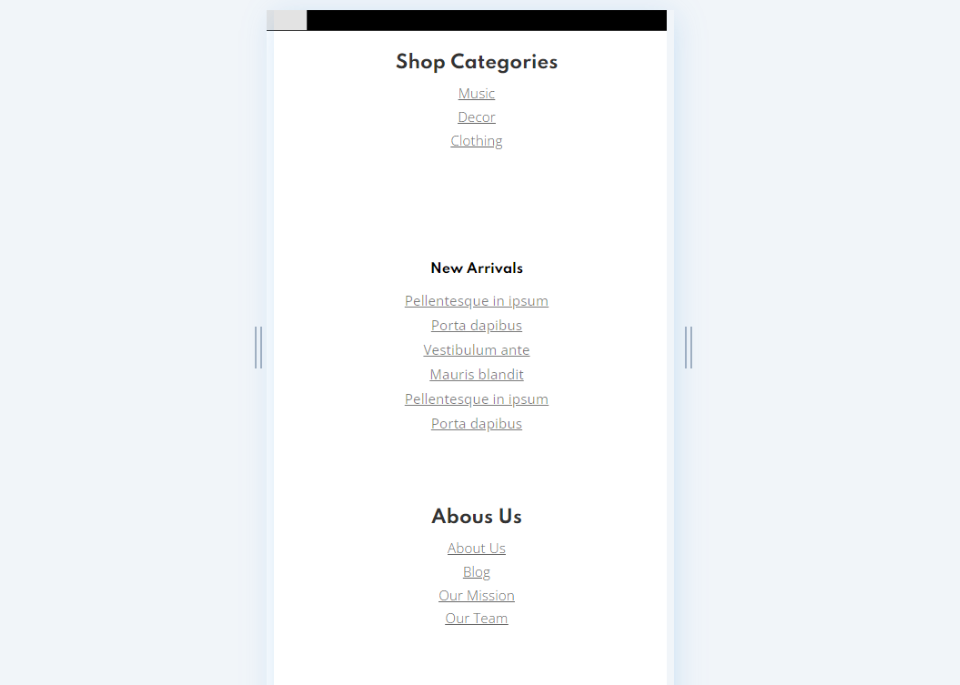
Here are the two mobile menus. They stack normally and blend well with the menu in the middle that we didn’t change.
Ending Thoughts on Divi Footer WordPress Menus
That’s our look at how to add Divi footer WordPress menus to your website. These menus are easy to create using the footer widgets and adding them with Sidebar modules. They have the advantage of being easy to change. Once you’ve set up your sidebar module you can change the menu easily.
We want to hear from you. Have you added Divi footer WordPress menus to your website? Let us know in the comments.
The post How to Add WordPress Menus to Your Divi Footer appeared first on Elegant Themes Blog.